

Water Damage Repair Before Repainting: What NJ Homeowners Need to Know
Water Damage Repair Before Repainting: What NJ Homeowners Need to Know
You could handle minor wood repairs yourself if the damage is small and accessible. But on a full exterior repaint, the inspection and repair phase touches every elevation of the house, requires probing and moisture testing, and sets up whether the paint job lasts three years or ten. Most homeowners who look at what that actually involves hand it to a contractor.
Understanding what that process looks like is still worth your time. Water damage repair is where corners get cut most often, and it is where the difference between a job that holds and one that starts failing in year two usually comes down to.
What Water Damage Actually Looks Like on a Residential Exterior
Water damage on an exterior is not always obvious from the ground. Some of it announces itself: paint that is bubbling, peeling in sheets, or showing brown stains through the surface. But a lot of it is subtle, especially on older homes where the damage has been accumulating behind the paint film for years without anyone addressing it.
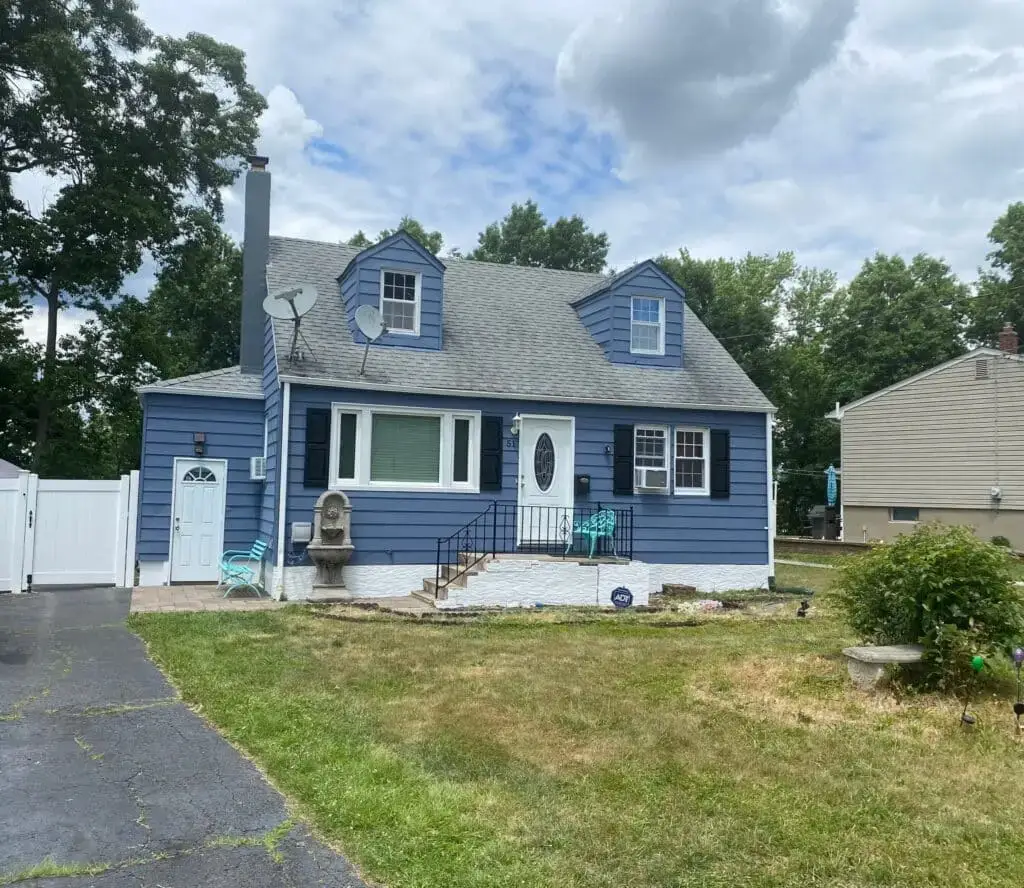
The areas to pay attention to on a residential exterior include anywhere water can pool or concentrate: window sills and casings, the tops of trim boards, fascia directly behind gutters, transitions at dormers or additions, and any horizontal surface that holds moisture instead of shedding it. Wood in those locations takes far more water contact than the siding panels between them, and it shows up first.
On homes in Middlesex County built in the 1960s and 70s, the original wood trim and fascia are often still in place. When that wood has never been properly primed on all four sides, or when caulk joints have been failing and refilling for decades, the moisture exposure adds up. By the time a repaint is scheduled, what looks like a paint adhesion problem from the street is sometimes structural wood damage underneath.
How Contractors Identify Water Damage Before the Job Starts
Visual Inspection
A thorough inspection covers every elevation of the house, not just the street-facing side. North-facing walls and areas shaded by trees tend to hold moisture longer and show mildew and paint failure differently than sun-facing elevations. The back of the house and areas near landscaping often have damage that goes unnoticed until someone is up close on a ladder.
The contractor should be looking for bubbling or peeling paint, soft spots in wood when pressed, discoloration through the paint film, caulk that has pulled away from window or door casings, and staining on siding panels below trim transitions. Each one of those signals something different about the moisture source and how far the damage has spread.
Probe Testing
Visual inspection alone does not catch everything. A screwdriver or awl pressed into suspect wood tells you quickly whether the fibers underneath are solid or have started to break down. Soft, spongy wood that gives under pressure needs to come out before any prep or priming begins. Paint will not bind to compromised wood, and covering it traps the moisture that is already there.
Moisture meters take the guesswork out of borderline cases. Wood that reads above 15 percent moisture content is not ready to prime. On homes where the paint film is intact but adhesion has been failing in patches, a moisture meter often finds elevated readings that explain exactly why.
A Common Scenario in the Field
On a cape cod in Fords, the fascia boards along the rear roofline looked intact from the driveway. Paint was holding, no obvious peeling. When we pulled the gutters off for inspection, the wood behind them told a different story. The bottom two inches of every fascia board across the full rear elevation had gone soft from standing water that had been backing up behind a clogged gutter for at least two seasons. A screwdriver went in without resistance across roughly 40 linear feet of board. We replaced all of it, back-primed every new board with oil-based primer before it went up, let the wood sit for three days until moisture readings dropped below 12 percent, then re-integrated the flashing before any topcoat work started. The repair added four days to the project timeline and about $1,100 to the scope. The homeowner had budgeted for a straight repaint. None of that damage was visible from the ground.
What the Repair Process Looks Like
Wood Replacement vs. Consolidant
When wood is structurally compromised, it comes out. There is no product that fully restores load-bearing wood that has lost its structural integrity. The replacement material should be primed on all four sides, including the back face, before it goes up. Skipping that step on the back face is how the cycle starts over. For back-priming replacement boards, Zinsser Cover Stain Primer is a reliable choice: it bonds to bare wood, blocks tannin bleed on cedar and pine, and dries fast enough that boards can go up the same day.
For damage that is surface-level rather than structural, epoxy wood consolidants like LiquidWood paired with a filler like WoodEpox can stabilize the area and give the primer something solid to bond to. This is appropriate for minor rot at the edges of trim boards or small voids in window casings, not for fascia that has gone soft across its full depth. A contractor who reaches for filler on structural damage is patching over a problem, not fixing it.
Caulk Removal and Resealing
Failed caulk is one of the most common moisture entry points on a residential exterior, and it is also one of the most commonly overlooked. Old caulk that has cracked, pulled away, or turned hard and brittle does not get painted over and called done. It gets removed completely, the joint gets cleaned, and fresh sealant goes in before any prep or priming starts. For most exterior joints on residential trim, a paintable urethane caulk like Sherwin-Williams Loxon or NPC Solar Seal holds up better than standard latex caulk because it stays flexible through freeze-thaw cycling instead of hardening and cracking.
The critical spots are window and door casings, transitions between trim and siding, and anywhere two dissimilar materials meet. On older NJ homes, those joints have often been recaulked multiple times without the old material ever being removed. The result is a thick, layered bead that has no adhesion to either substrate and is holding moisture against the wood rather than keeping it out.
Drying Time
Replaced wood and freshly caulked joints need time to dry before primer goes on. In New Jersey, spring and fall conditions can extend drying time depending on humidity and overnight temperatures. A contractor who rushes this step because the schedule is tight is handing you a paint failure in the making. Primer applied over wood with elevated moisture content will blister and peel when that moisture works its way out.
Why NJ Freeze-Thaw Cycles Make This Non-Negotiable
New Jersey winters are hard on exterior coatings because of how freeze-thaw cycling works on moisture that is already in the wood. Water expands when it freezes. If that water is trapped under a paint film because the damage underneath was painted over rather than repaired, each freeze cycle physically separates the coating from the substrate a little more. By spring, you have bubbling, cracking, and peeling that looks like a paint failure but is actually a moisture failure that was set up the previous season.
Middlesex County homes that go into a repaint with unaddressed water damage do not make it two winters before that damage shows up in the finish coat. Addressing it before painting is not optional on a job that is supposed to last.
For a full picture of how water damage repair fits into the complete repaint process from inspection through final coat, see our guide on complete exterior repaints for NJ homeowners.
What Water Damage Repair Adds to a Repaint Budget
Minor caulk removal and resealing is typically included in a thorough prep estimate. Wood repair is where costs vary. Replacing a single fascia board runs roughly $250 to $600 depending on size, access, and whether flashing needs to come off to do it properly. A full fascia replacement on a two-story colonial with gutter removal included can run $1,000 to $2,000 before painting starts.
The right contractor finds this during the estimate walk, not after the job starts. Any contractor who discovers significant wood damage mid-job and treats it as a surprise add-on either did not inspect the house properly or is using it as an upsell opportunity. Either way, it is a problem. A thorough pre-job inspection should uncover the scope of repairs needed before you sign anything.
Cost figures are estimates based on typical Middlesex County conditions. Verify with your contractor during the estimate.
Common Mistakes Homeowners and Contractors Both Make
• Painting over soft wood without probing first. It looks fine until the paint starts to bubble within a season.
• Recaulking over old caulk instead of removing it. Layered caulk has no bond and traps moisture against the substrate.
• Priming before replaced wood has fully dried. Moisture content above 15 percent means adhesion failure is coming.
• Treating water damage repair as optional when prep budgets are tight. It is the one step you cannot skip and expect the job to hold.
• Ignoring the back face of replacement boards. Wood that is not primed on all faces takes moisture from behind and the cycle starts over.
Best Practices for the Repair Phase
Ask your contractor specifically how they handle water damage discovery during the estimate walk. A contractor who gives you a number without walking every elevation and probing suspect areas is not building an accurate quote. You want someone who pulls the gutters off the back of the house to look at the fascia behind them, not someone who quotes from the driveway.
Get the repair scope in writing before work starts. If the inspection turns up additional damage once prep begins, a reputable contractor will document it and discuss it with you before proceeding. Surprises after work has started are usually the result of inadequate inspection, not genuinely hidden conditions.
Understand that repair time adds to the project timeline. Replaced wood needs to cure. Caulk needs to dry. Moisture readings need to come down before primer goes on. A schedule that does not build in that time is cutting corners somewhere.
Frequently Asked Questions
How do I know if my home has water damage before getting a paint quote?
Look for bubbling or peeling paint, staining through the surface, soft spots you can feel when pressing on trim boards, and caulk that has cracked or pulled away from window casings. Any home built in the 1960s or 70s with original wood trim should be probed during the estimate walk, not just visually inspected.
Can a contractor paint over water-damaged wood if it is treated first?
Surface-level damage that has been stabilized with epoxy consolidant and is fully dry can be primed and painted. Structurally compromised wood that has gone soft through its depth needs to be replaced. There is no coating system that compensates for wood that has lost its structural integrity.
What is the difference between rot and water damage?
Water damage is the broader category. Rot is what happens when water damage progresses to the point where wood-decaying fungi have broken down the wood fibers. Early-stage water damage can sometimes be stabilized; rot typically cannot. The distinction matters for repair scope and cost.
How long does water damage repair take before painting can start?
Caulk typically needs 2 – 4 hours to dry before primer goes on. Replaced wood needs to reach a moisture content below 15 percent, which can take several days to a week depending on weather conditions in New Jersey. A contractor who is rushing this timeline is setting up an adhesion problem.
Does water damage repair affect my paint warranty?
Most paint manufacturer warranties require that the substrate be properly prepared, which includes addressing moisture damage before application. If a contractor skips repairs and the paint fails, the warranty claim will not hold up. The prep phase is what the warranty is actually built on.
Should I get a separate contractor to do the wood repairs?
Not usually. A painting contractor experienced in residential exterior work handles standard wood repair and caulking as part of the prep phase. If the damage is structural enough to require a carpenter for framing work or significant rot remediation, that is when a separate trade makes sense. Your painting contractor should be able to tell you which situation you are in after the inspection.
Red Trim Painting Services LLC has been handling residential exterior repaints across Middlesex County and surrounding NJ communities for over 10 years. Water damage repair is part of our standard estimate process, not a mid-job discovery. We walk every elevation, probe suspect areas, and scope the repair work before any contract is signed.
Exterior Repaints Near You
We handle complete exterior repaints across Central NJ. Find our exterior painters in Woodbridge, Edison, East Brunswick, Old Bridge, and Bridgewater. See our residential exterior painting services or get a free estimate.